

| English | Korean | Chinese | Japanese |
 IP Device
Chapter 2. Configuration: IP Device
Set up IP Devices
1. GOP Interval: IP cameras must be set to the baseline profile with a GOP interval of 1 second to properly enable VMS features.
2. Device List: In the Device List, click the  button at the bottom to add a new device. To add a sub-stream for a channel, click the button on the right pane.
3. Multi-Streams: You can assign up to nine sub-streams, including the primary stream, to one channel. Multi-streams can be useful in the following scenarios:
a. If you want high-resolution live monitoring but need to store recordings for a longer period in low resolution.
b. If you want to save high-resolution videos but also need to relay RTSP streams for analysis in lower resolution.

4. Enable: Select a device from the list to configure. On the right side, set the Enable option to "ON".
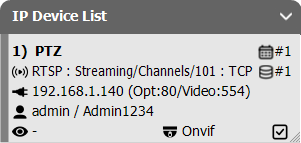
5. Channel No: Change the channel number if needed.
a. Ensure there are no duplicate channel numbers.
b. Channel numbers are used as the folder name for video recordings, so they must be unique.
6. Input Type: Select the input type from "Maker", "RTSP", "RTSP(Legacy)", or "Mobile".
a. If you can find the manufacturer of the IP camera in the list, select "Maker".
b. If you cannot find the manufacturer in the list, select "RTSP" and enter the necessary connection information in the RTSP field. (Refer to the technical information included with the product.)
c. Select "Mobile" and enter the "Channel Alias" to stream video from your mobile device. Download VMS Cam from the App Store (iOS) or Play Store (Android). In the mobile app’s settings, enter the same "Channel Alias" as in VMS. You can also select whether to record the connection event of mobile channels.
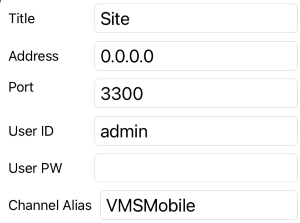
7. Connection Information: Enter the connection information.
a. Enter the IP address of the device. The device must have a static IP address.
b. Enter the port numbers for video and option settings. Typically, the RTSP video port number is 554.
c. Enter the connection ID and password.
8. Buffering: Set buffering values for Live and Playback streams.
a. Live: Live Stream Buffering in seconds (0 for no buffering)
b. Playback: Playback Stream Buffering in number of GOPs (0 for no buffering)
9. Recording Schedule: Select the recording schedule defined in the previous "Schedule" section.
10. No Connection: Select whether to skip connecting to the channel.
11. Ping Test: Select whether to perform a ping test before connection.
12. Auto Stream Selection: Select the preference for `Auto Stream Selection`
a. Select `Single Display` for the stream you want to use in a single-channel display.
b. Select `Multi-Display #1/#2` for the stream you want to use in multi-channel display. The #1 stream will be used if available; otherwise (e.g., if it has been deleted), the next stream will be used.
c. You need to designate a `Single Display` and at least one `Multi-Display` to enable this feature.
13. Motion Detection and PTZ Handler: Select the Motion Detection and PTZ handler.
14. Connection Test: Click the `Connection Test` button to check whether all connection information is correct. The video will be displayed if everything is OK.
15. Find ONVIF Devices
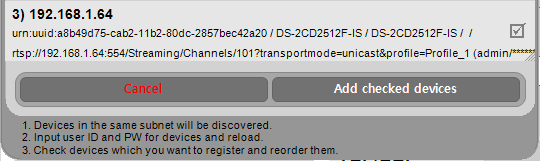
a. Click the "Find ONVIF Devices" button. In the popup dialog, all ONVIF-compliant IP video devices in the same subnet will be listed. (Registered devices are grayed out.)
b. Some devices require entering an ID and password to retrieve the necessary information. Click the retry button (  ) and enter the ID and password.
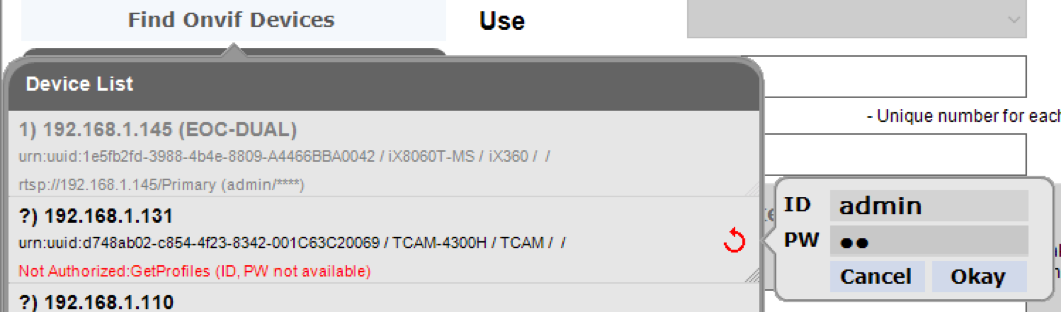
c. Arrange the order of devices by dragging each item. The order is important because it determines the channel number, which is used for the name of the video-saving folder.
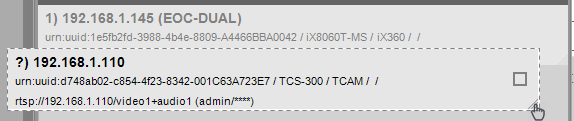
d. Check the devices you want to register and click "Add checked devices".
 System
 Storage
 Recording Schedule
 Channel Group
 Network
 User
User Event
Event Notifications
 MQTT
MQTT Misc.
Misc.