

| English | Korean | Chinese | Japanese |
 VMSCam
Chapter 8. Mobile Clients: VMSCam
Configurations
1. In the main server list, tap the  Add button at the top to add a new VMS server to transmit video.
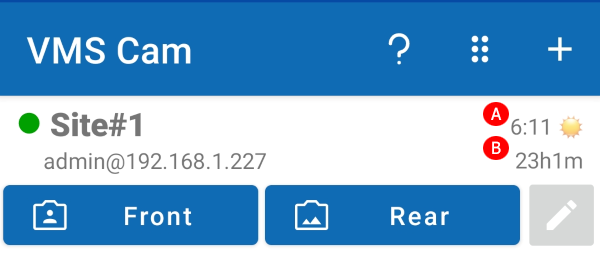
Android
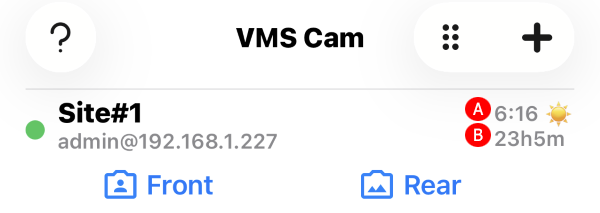
iOS
· A: Server uptime in seconds
· B: Time in the server's time zone
2. On the edit screen, input the server connection details:
· Title: The VMS server name displayed in the main menu.
· Address: URL or IP address of the VMS server.
· Port: Port number for VMS server connection. Default is 3300, configurable in VMS settings.
· UserID/UserPW: ID/PW for server access.
· Channel Alias: Unique ID to identify the receiver channel, this ID is set in the VMS Server's configuration.
· Rear/Front Camera settings:
· Resolution Button: Tap to set the resolution of the rear camera
· Bitrate Slider: Swipe to set the bitrate of encoding
· Audio Included: Check to include the audio
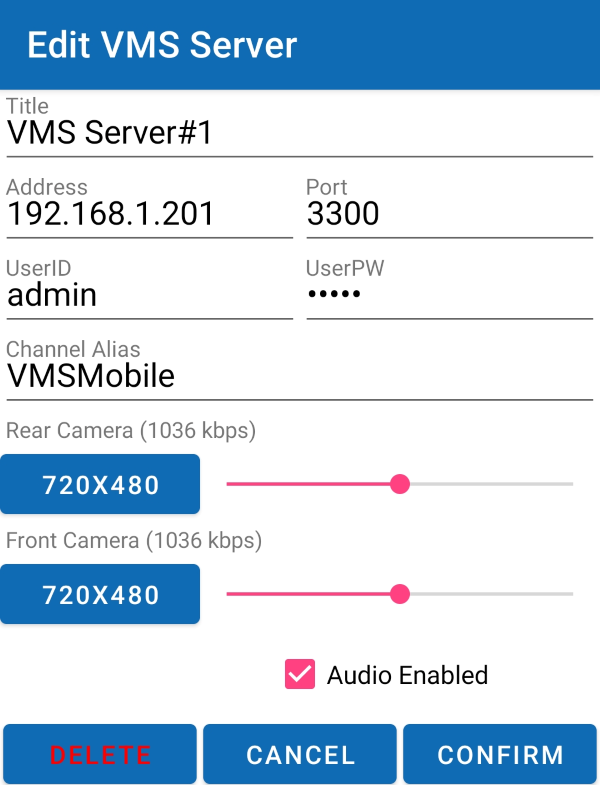
Android
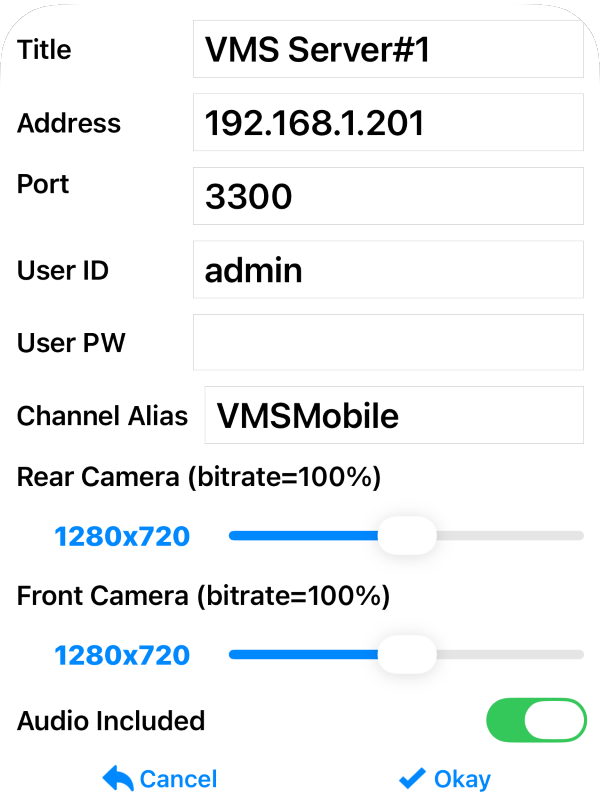
iOS
3. To edit existing server info:
· Android: Tap the  Edit button next to a server item.
· iOS: Swipe to reveal edit and delete options.
4. To reorder the list, tap the  Reorder button at the top and long-press the Drag button next to an item to move it.
5. Tap the  Help button to open the help page.
Taking Video and Transmitting
1. Tap the  Front or
  Rear button to open the camera.
2. In camera mode, tap  Torch to turn on the torch, or tap the
  Flip button to switch between the front and rear cameras.
 VMSClient